tutorial
for
Ulead EditorsThis tutorial will show you how easy it is to make a simple move from the MediaStudio timeline. The process for VideoStudio is almost identical. Check out the QuickStart Guide for further details, as well as the Frequently Asked Questions.
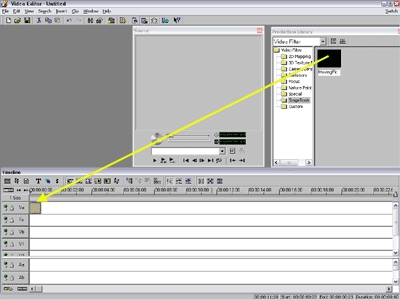
Open up your editor and place a clip on the timeline.
The clip should be as long as you want the move to be.
Make sure the Video filter tab is open in the Production Library.
Scroll down until you come to one called: StageTools and
click on it. (If it is not in the list, click here)
Drag the box marked "MovingPic" over your clip.For VideoStudio Only:
- Drag a clip to the timeline and click on it.
- Select 'Video Filters' in the pulldown on the right of the screen.
- Select the box called 'MovingPic from the list of filters.
- Drag it to the clip on the timeline.
- Click on the 'Filter' tab on the left of the screen.
- MovingPic shoud be in the list of applied filters.
- Click on the 'Customize Filter'.
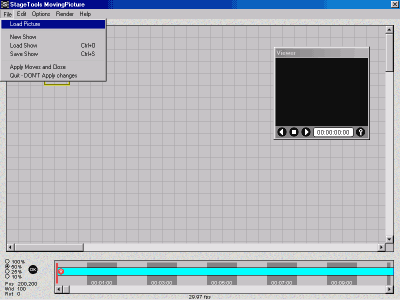
The MovingPicture screen will appear.
Click on the Load Picture item in the File menu.
Choose a picture to move.
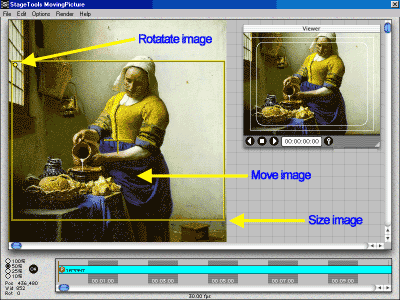
Drag yellow box to frame up start of move.
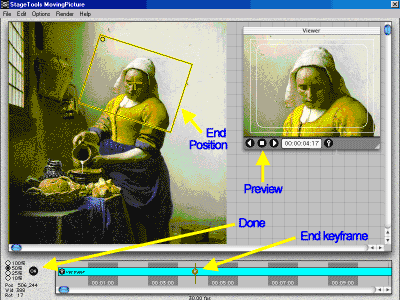
Choose time for end of move by clicking on Timeline.
Drag yellow box to frame up the end position of move.
Preview your move with the Viewer player buttons.
Click on the OK button to return to MediaStudio.You can re-edit the moves by right-clicking on the clip and selecting the Video Filters... item and then clicking the Options button,
Installation for MediaStudio or VideoStudio
Close MediaStudio/VideoStudio, if it is open.
Files are in self-extracting format to speed up the downloading process. Simply double click on the .exe file and it will ask what folder you what to put them in.
Select the the ..\vft_plug folder for plug-ins.Drag the help file, called Moving.hlp to the C:\ folder (the root directory of the c: drive).


